- Categories
- CATEGORY
- AGE
- TYPE


by Vidhya
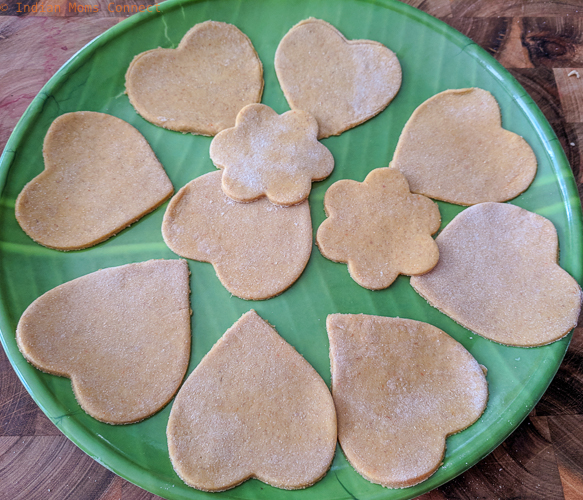
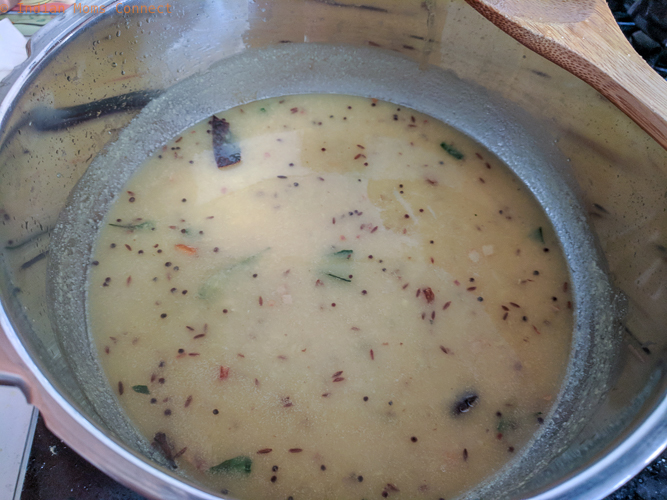
Why does it have to always be heart-shaped cookies, cakes or chocolates for Valentine's Day? How about presenting a traditional recipe with a simple tweak instead? Here comes the kid-friendly heart shaped dal
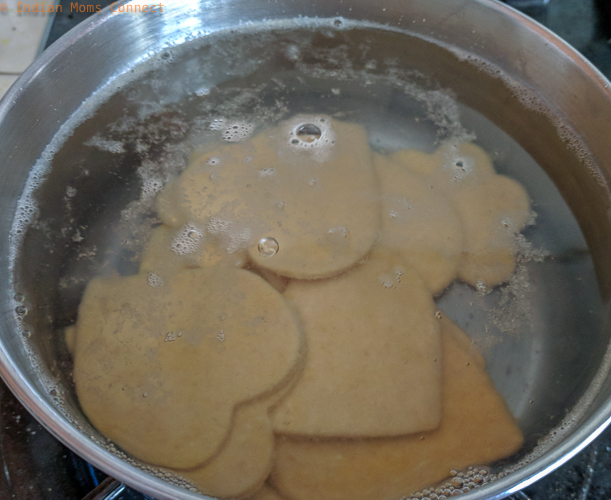
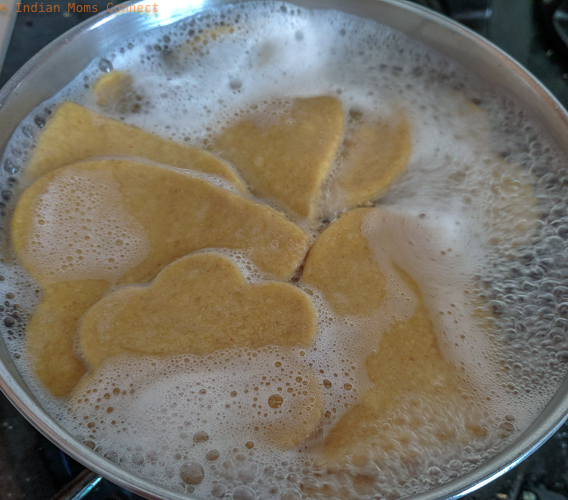
I always call Dal Dhokli Indian wheat pasta simmered in yellow lentil sauce! Last September I posted a Rajasthani Style Dal Dhokli on my blog. As kiddo likes this very much, I decided to try the Gujarati version also. And that's when I got the idea of trying different shapes of
I have shared the dal version that my family likes. But the sky is the limit for the dal recipe. You can make your style of dal and add these
A kitchen is a place where a lot of creativity can happen. Like our previous
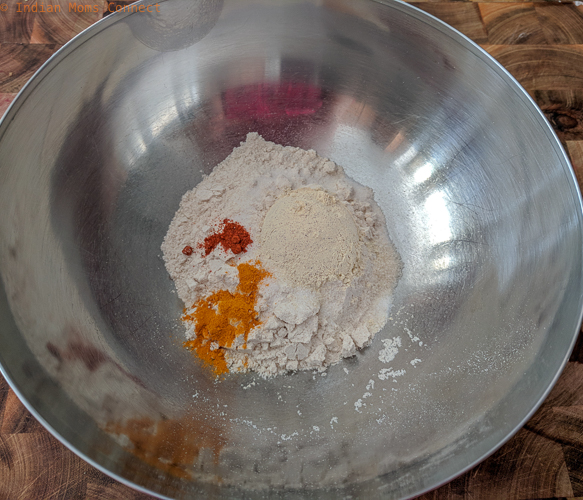
For the Dhokli
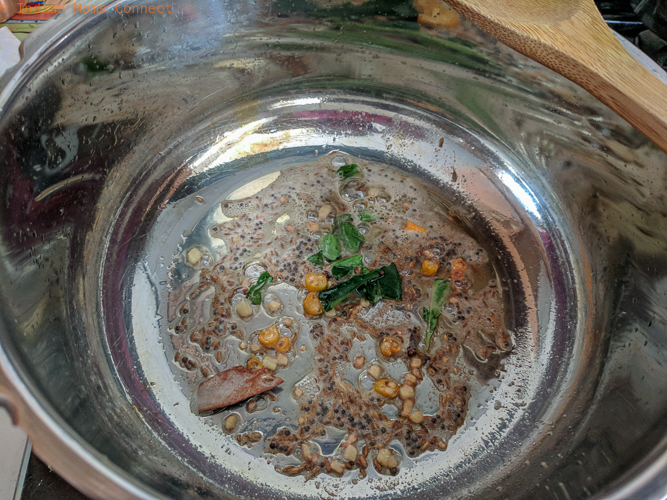
For the Dal
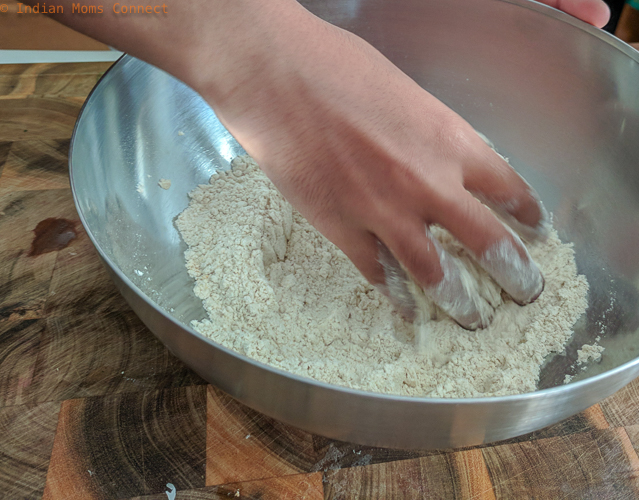
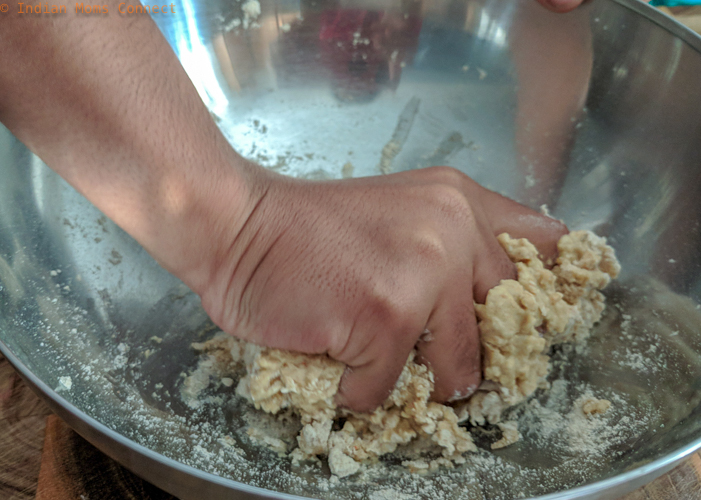
Parental Steps | Prep work
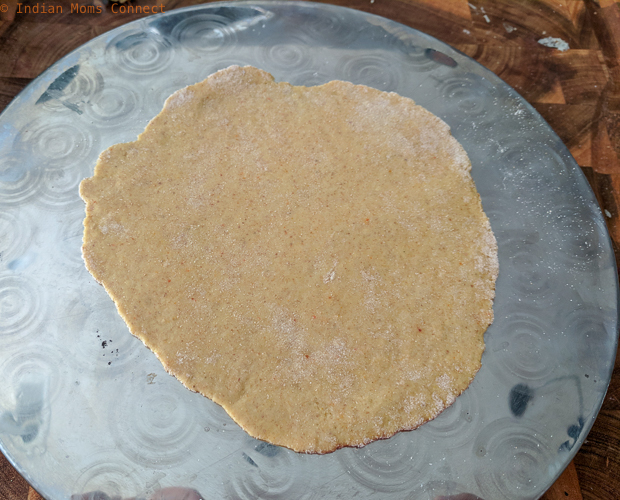
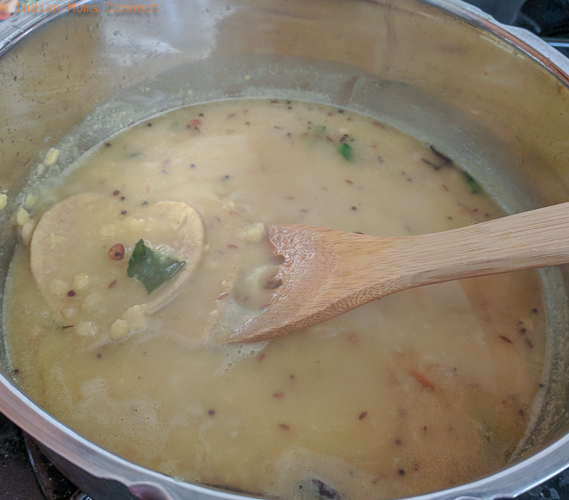
Preparing the Dhokli
Parental Steps | Preparing the Dal
Serve hot with a dollop of ghee.
Notes
Toka Yum Moment
As I mentioned above, my kiddo likes this very much and every time I make this he keeps asking this question - why can't we prepare
by Preethi
1. Valentine’s Day is coming up and I found out that my daughter’s school does a card exchange. I thought – Ok fine! I will go to Target and get those cards and be done with! Then a rainy Sunday arrived with absolutely nothing to do. Anyone with a 4 yr old knows that they demand to be kept busy otherwise there is a destruction of property, whining and crying, unreasonable demands … you get the picture!
What better to keep a preschooler busy than making a ton of mess!
Here is what we used:
1. Card paper – plain white
2. Red and Pink watercolors
3. Large brush
4. Scissors
5. Glue
Most of us would have this paraphernalia at home. I had decided I had to come up with something that –
1. It did not involve running out to the store.
2. It also had to involve a fickle preschooler
3. It could hold her attention and
4. I should not end up doing all the work (Gosh! I hate that! :))
We went through some iterations, which were too intricate and involved too much work – for me.
Then I decided to get simple. Hand over the paint and brush and have the preschooler go to town painting on card paper.
Find something with texture so it is not just paint smeared. Actually, if it is paint smeared that would be ok too!
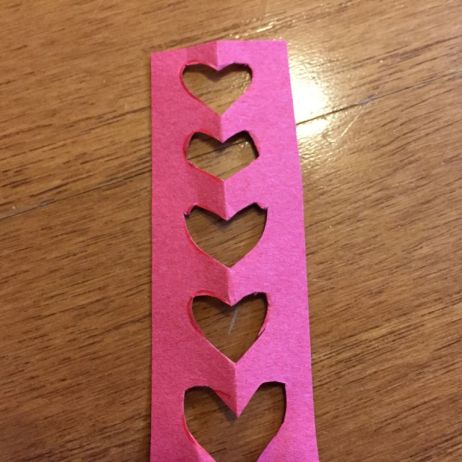
Let the paint dry. Create a heart-shaped template using some card paper to use to cut out heart shapes from the
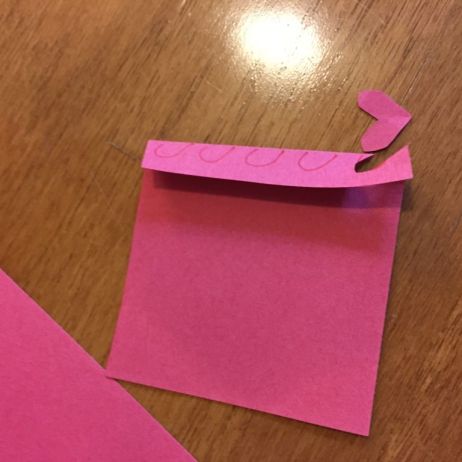
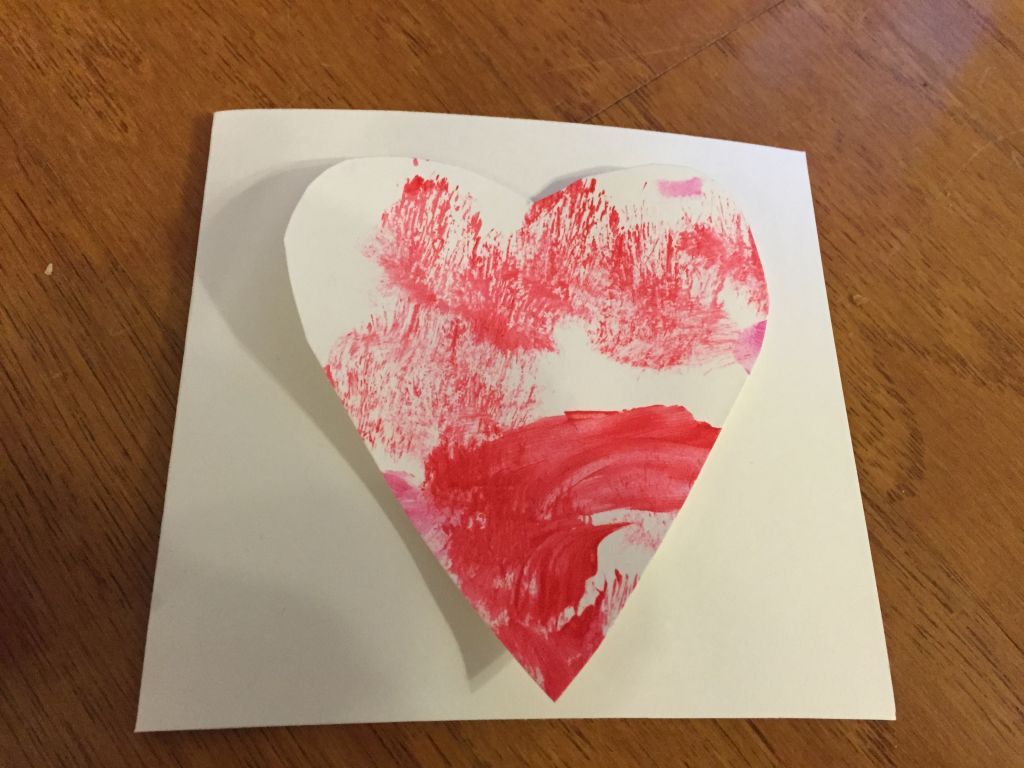
Next using a plain white card paper, fold in half longitudinally.
Place a heart shape to measure and cut a folded square card.
Give your child some glue and have them stick the heart right in the center.
That’s it! You are done!
Happy Valentine’s Day!
by Ramya
I came across a number of Valentine’s Day crafts on Pinterest. A’s school got the kids to make a heart out of air drying clay and painted it red. They sent it home to us, after placing a tea light holder in the center of the heart.
Though back home, I had never seen anyone involve kids in a Valentine’s Day celebration; the school’s involvement here made me hunt for some crafts. I have a friend in the US, whose 2 sons had to each make 30 valentine day cards for their schoolmates and some more for their teachers as well. My friend, who chose to make the cards at home, instead of simply buying them from the store, swore that this was her first and last time at it!
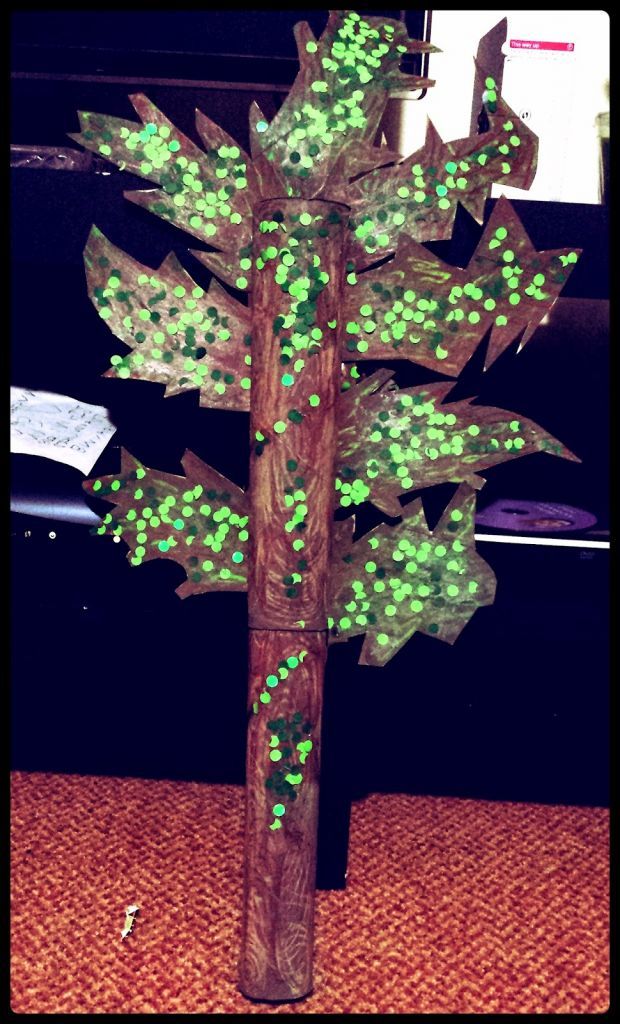
So I thought, why not, let me give it a shot too – at least, I had no such commitments at school, so we made it a home project. I looked up a number of crafts and the ‘Valentine Tree’ interested me. Though what I saw was a miniature craft, a thin branch of twigs arranged in a small pot and hung with decorations, I ended up making just something else altogether! I wanted to use the tissue paper rolls which we had begun to save up, by default – just in case, a craft caught our fancy! So I set about making my tree from scratch.
I picked up 2 kitchen tissue rolls that are almost double the length of the standard toilet tissue rolls and fixed one on top of another vertically to make the trunk. I then cut a dozen regular tissue rolls to flatten them up. I asked
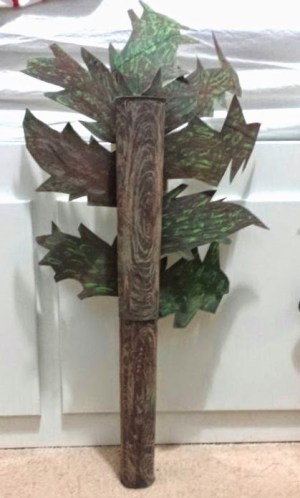
I wanted to jazz it up a bit, but couldn’t think of anything, so this is how our tree looked for almost 3-4 days. And then, as I was punching colored paper one day for some other craft, I had an idea. I picked up 2-3 different green colored sheets and punched them quite a bit and stuck all the green dots randomly on the tree. I liked the look, here it is:
For the hearts, I picked up another recycling idea; you would probably laugh if I tell you this! I cut out hearts from plastic milk cartons! Hahaha!! I got this idea from a mommy online who made suncatchers with these – they did not seem like a very bad idea. A and I got to work with doing patterns and decorations on the hearts. We used everything and anything from buttons to felt to foam to beads to stars to even paper! A glimpse –
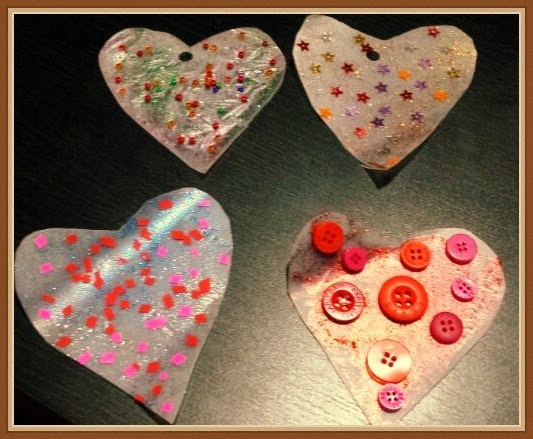
All the decorations were done by A with glitter glue and regular glue. I just did the cutting work wherever required! We took about 2 days to dry all our crafts and when they were ready, I punched a hole at the top middle of the hearts and drew red satin strings through them. When everything was ready, we put up the hearts on the tree and the decoration was done!
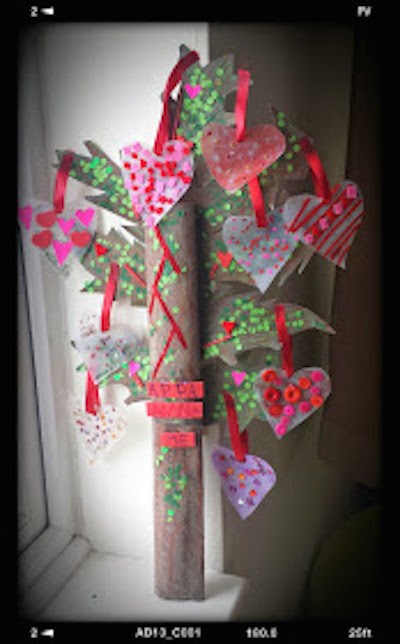
This is our tree of love – ‘Appa, Amma and Me!’ We presented this to Appa when he came home tired on Valentines’ day evening – as expected, it was perfect to brighten up his evening! This was followed by a special dinner too! Heart shaped pasta! Yay!

Happy Valentine's Day!